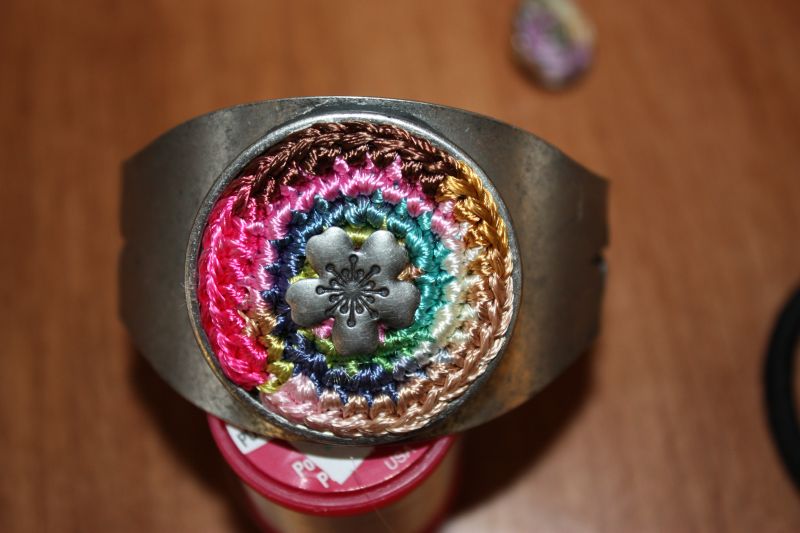
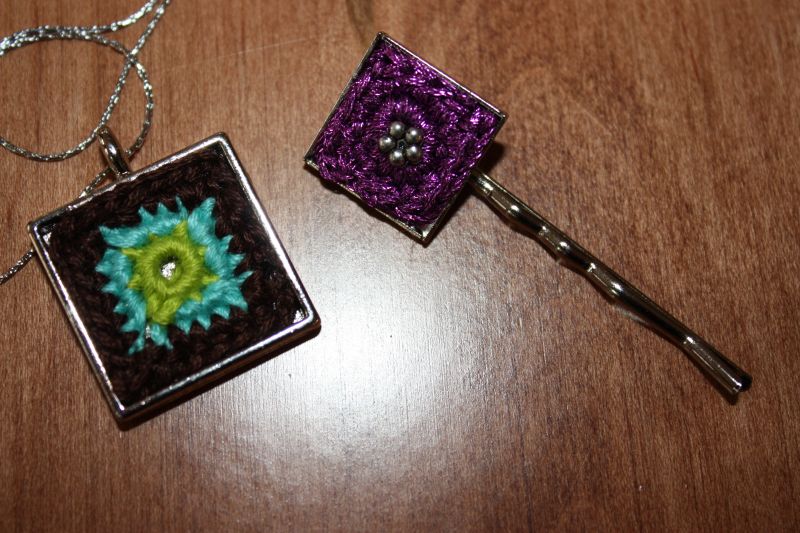
So bezels have become very popular in the craft stores. Hobby lobby has a pretty good selection. I think they are generally meant for inserting little pieces of fabric or pictures and then covering the inserts with resin or acrylic. These make some really nice pieces of jewelry. But of course, this post wouldn’t be on M YarnCraft if it was about fabric and resin. I saw the opportunity to put little pieces of crochet work inside the bezel. The bezel sort of acts like a frame and the crochet as the art … how cool. Here are some of the items I’ve been working on.
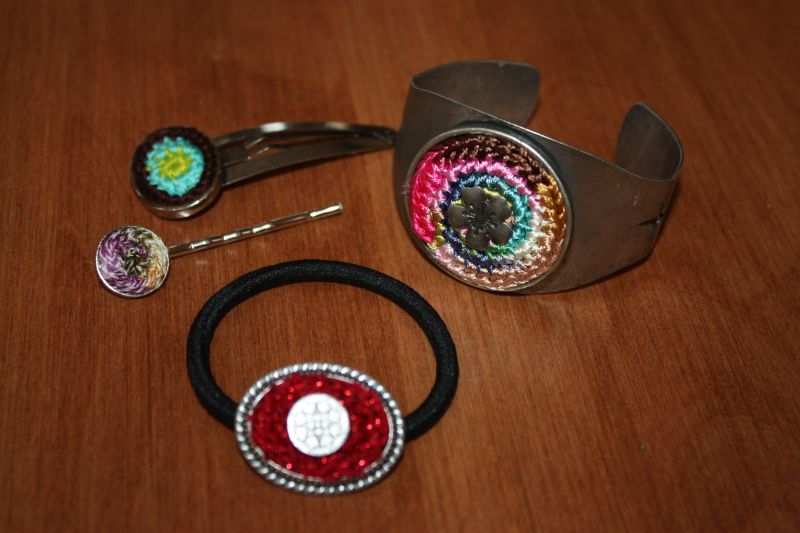
All of these pieces were crocheted with embroidery floss or sock yarn and a 0.5 mm hook. As for patterns, I kind of just make it up as I go along. Once you’ve got the piece crocheted, you can glue it into the bezel using Embellish It! from Beacon.
For a basic circular piece I start with a magic loop (I found a tutorial on YouTube if you’re not familiar with this technique) and 6 single crochet (sc). Then I do circular increases until it fits into the bezel. So a basic pattern would be as follows.
Round 1: 6 sc in magic loop
Round 2: increase in every stitch — 2 sc in every sc of round one for a total of 12 sc
Round 3: increase in every other stitch — 1 sc in next st, 2 sc in next st around for for a total of 18 sc
Round 4: increase in every third stitch — 1 sc in each of next 2 stitches, 2 sc in next st around for a total of 24 stitches.

The bracelet used 4 rounds and the bobby pin used only two rounds. So you can see that these are really quick projects!
The square was a little more challenging. I tried granny squares but they always ended up too big for the square bezels.
So, here’s what I did for the bobby pin:
Magic Loop
Round 1 – 8 sc into loop
Round 2 – sc in first sc, sc in next sc, chain (ch) 2, sc in same sc, *sc in next stitch, sc in next stitch, ch 2, sc in same stitch* 2 times, sc, ch2, slip stitch into next sc.
If this wasn’t going into a bezel it would be a pretty ugly square, but because you have the opportunity to shape it inside the bezel by stretching it as the glue is setting it actually ends up looking pretty good. To make the larger square (the pendant) I just did some sc increases in the corners. So when you get to the corner do 2 or 3 sc in the corner sc. It’s not perfect, but like I said, you can stretch it once it’s in the bezel.
Finally, for the ovals I used two methods – the first starts with chain stitches as described below.
Round 1: Ch. 5, sc crochet in second ch from hook and in next 2 sc, 3 sc in last sc, do not turn and work up the other side, sc in next 2 stitches, 2 sc in last stitch, ch. 1.
Round 2: 2 sc in first sc, sc in next two stitches, 2 sc in next 3 stitches, sc in next two stitches, 2 sc in next two stitches.
Keep working in rounds, increasing at the ends of the oval until it fits in your bezel.

The other way that I did ovals was to start with a magic loop with 8 sc in it (like for squares), but in round 2, I did half double crochets at the ends to extend them. So it would be like this:
Magic Loop
Round 1: 8 sc in loop
Round 2: sc in first 2 stitches, 2 half double crochet (hdc) in next stitch two times, sc in next two stitches, 2 hdc in next stitch two times
Round 3: sc around (you can increase again at the ends if you need to)


So, these are all the ways that I’ve been crocheting with bezel pieces. If you decide to try out a little crochet in bezel piece I would love to hear from you!
Andrea


